Oyakodon Japanese Chicken And Egg Rice Bowl Recipe
There’s something uniquely comforting about a one-pan meal that comes together in under 30 minutes, yet tastes like it’s been simmering for hours. That’s the magic of this Oyakodon Japanese Chicken and Egg Rice Bowl recipe. It’s a dish that embodies the elegance and simplicity of Japanese home cooking. The name itself, “oyako,” translates to “parent and child,” a poetic reference to the chicken and egg cooked together in the same pan. This is my go-to recipe when I need something quick but impressive.
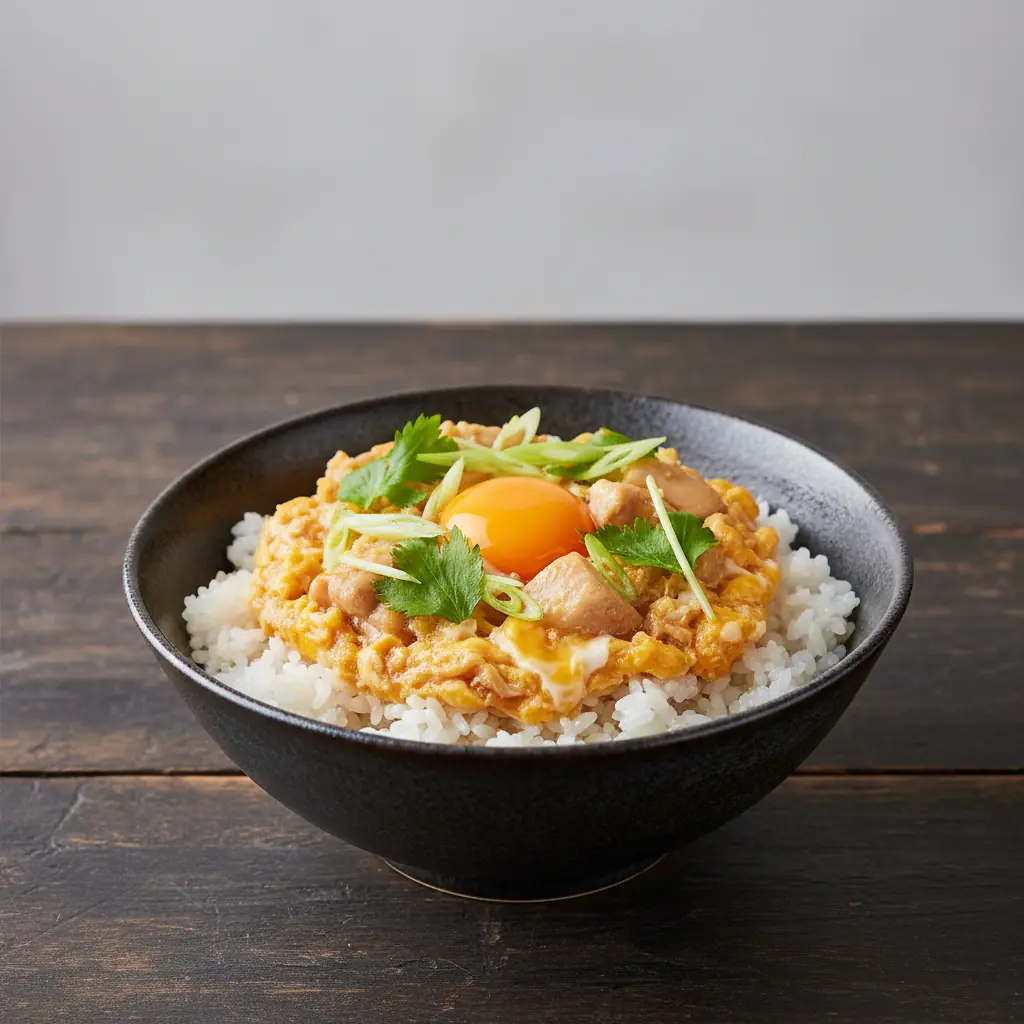
The first time I made Oyakodon, I was captivated by how a few simple ingredients—dashi, soy sauce, and mirin—could create such a profoundly savoury and satisfying broth. The chicken becomes incredibly tender as it simmers, and the onions soften into sweet, translucent ribbons. The final flourish, a gently cooked egg that binds everything together in a silky, custardy embrace, is what truly elevates this dish. It’s not just a meal; it’s a bowl of pure contentment.
In our kitchen, this recipe has become a staple. It’s the perfect answer to “What’s for dinner?” on a busy weeknight. It requires minimal washing up and delivers maximum flavour. We’re going to walk through every step together, from preparing the chicken to getting that perfect soft-set on the egg. I’ll share all the little tips I’ve picked up over the years to ensure your Oyakodon is absolutely delicious every single time. So, let’s get the rice cooking and dive into creating this wonderful Japanese rice bowl.
Recipe Overview
- Prep time: 10 minutes
- Cook time: 15 minutes
- Total time: 25 minutes
- Servings: 2
- Difficulty: Straightforward
Why You’ll Love This Oyakodon Japanese Chicken and Egg Rice Bowl Recipe
- A Symphony of Flavours: The dashi-based broth is the heart of this dish, offering a beautiful balance of savoury (soy sauce), sweet (mirin), and umami (dashi). It’s a deeply flavourful but delicate sauce that perfectly complements the chicken and egg.
- Wonderful Textures: You get the tender, juicy chicken, the soft, sweet onions, the fluffy rice, and the crowning glory of the silky, just-set egg. Every spoonful is a delightful combination of textures.
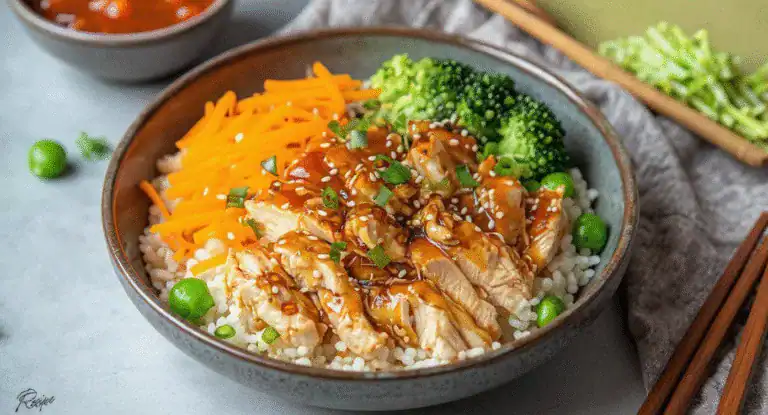
- A Complete Meal in One Bowl: With protein from the chicken and egg, carbohydrates from the rice, and vegetables from the onion and garnish, it’s a well-rounded meal that leaves you feeling nourished and satisfied. It’s a fantastic alternative to our usual Taco Rice Bowl 2 when we fancy something different.
- Remarkably Quick to Prepare: From chopping the onion to sliding the finished topping onto your bowl of rice, the whole process takes less than 20 minutes of active cooking time, making it ideal for a weekday dinner.
- Authentic Japanese Home Cooking: This recipe brings a genuine taste of Japan into your kitchen. It’s a dish that is cherished in Japanese households for its simplicity and soulful character.

Ingredients You’ll Need
- 300g boneless, skinless chicken thighs, cut into 2-3cm bite-sized pieces
- 1 medium brown onion, halved and thinly sliced
- 3 large free-range eggs, lightly beaten
- 2 servings of cooked Japanese short-grain rice, kept warm
- 2 spring onions, finely sliced, for garnish
- Mitsuba (Japanese parsley) or coriander, for garnish (optional)
- Shichimi togarashi (Japanese seven-spice), for garnish (optional)
- 150ml Dashi stock (Japanese soup stock)
- 3 tbsp soy sauce
- 3 tbsp mirin (sweet rice wine)
- 1.5 tbsp sake (Japanese rice wine)
- 1 tbsp caster sugar
For the Sauce (Warishita):
Tip: Using chicken thighs is highly recommended. They remain much more tender and juicy than breast meat during the simmering process, which really adds to the final dish’s texture.
How to Make Oyakodon Japanese Chicken and Egg Rice Bowl Recipe
- Prepare the Sauce: In a medium-sized frying pan (about 20-24cm is ideal), combine the dashi stock, soy sauce, mirin, sake, and caster sugar. Place the pan over a medium heat and stir gently until the sugar has completely dissolved. Bring the mixture to a gentle simmer.
- Cook the Onions: Add the thinly sliced onion to the simmering sauce. Spread them out in an even layer. Let the onions cook for about 3-4 minutes, or until they have softened and become translucent. They will absorb the delicious flavours of the broth.
- Simmer the Chicken: Add the bite-sized chicken pieces to the pan, nestling them amongst the onions in a single layer. Reduce the heat slightly to maintain a steady, gentle simmer. Cook for 6-8 minutes, turning the chicken pieces once halfway through, until the chicken is cooked through and opaque.
- Prepare the Egg: While the chicken is cooking, crack the 3 eggs into a small bowl. Use a fork or chopsticks to beat them lightly. You don’t want a perfectly uniform yellow mixture; aim for streaks of white and yolk to remain. This creates a more interesting texture in the finished dish.
- Add the Egg: Once the chicken is cooked, increase the heat back to medium. Pour the beaten egg mixture evenly over the chicken and onions. Try to cover as much of the surface as possible. I like to pour about two-thirds of the egg in first, let it set slightly, then drizzle the remaining third over the top.
- Cook to Perfection: Let the egg cook for 1-2 minutes. The edges should be set, but the centre should still be slightly runny and custardy. The residual heat will continue to cook it after you remove it from the heat. As soon as it reaches this stage, immediately remove the pan from the heat.
- Assemble the Bowls: Fill two deep bowls with the hot cooked rice. Carefully slide one half of the chicken and egg mixture from the pan directly over the top of the rice in each bowl.
- Garnish and Serve: Garnish your Oyakodon generously with the sliced spring onions and a sprinkle of mitsuba or coriander if you’re using it. A dash of shichimi togarashi adds a lovely, subtle heat. Serve immediately and enjoy.
Tips From My Kitchen
- Don’t Over-Beat the Eggs: The key to a beautiful Oyakodon is a marbled egg texture. Beat the eggs just enough to break up the yolks, but leave distinct streaks of white. This gives the final topping a wonderful, silky texture.
- Use a Lid (Sparingly): If you find the top of your egg isn’t setting, you can cover the pan with a lid for about 30 seconds. Be careful not to leave it on too long, as this can steam the egg and make it rubbery.
- Make Your Own Dashi: While instant dashi powder is convenient, making your own from kombu (kelp) and katsuobushi (bonito flakes) will elevate the flavour immensely. You can find more information on how to do this from trusted sources like BBC Good Food.
- Slice Onions with the Grain: For onions that hold their shape better while still becoming soft and sweet, slice them pole-to-pole (with the grain) rather than across the middle.
- Invest in a Good Pan: A traditional Oyakodon pan is small and has a lid, designed for making single servings. However, a good quality 20cm non-stick frying pan works perfectly well for making two servings at once.
Equipment You’ll Need
- Large frying pan or skillet
- Sharp knife and cutting board
- Mixing bowls
- Wooden spoon or spatula
Common Mistakes to Avoid
- Overcrowding the pan: Don’t try to cook too much chicken at once. If the pan is overcrowded, the chicken will steam rather than simmer in the broth, resulting in a tougher texture and a diluted sauce. If you’re doubling the recipe, it’s best to cook it in two separate batches.
- Wrong temperature: Cooking on too high a heat will cause the sauce to evaporate too quickly and can make the chicken tough and the eggs scramble. Too low, and the flavours won’t meld properly. A consistent medium simmer is what you’re aiming for throughout the process.
- Skipping the rest time: While Oyakodon is best served immediately, even the 30 seconds it takes to move from the stove to the table is crucial. This brief rest allows the residual heat to gently finish cooking the egg, transforming it from runny to a perfect, soft, custardy consistency. Don’t be tempted to overcook it in the pan.
What to Serve With Oyakodon Japanese Chicken and Egg Rice Bowl Recipe
Oyakodon is a hearty meal on its own, but for a more complete Japanese dining experience, consider serving it with these simple sides:
- A simple bowl of Miso Soup
- Tsukemono (Japanese pickled vegetables) like pickled ginger or daikon
- A light Sunomono (cucumber salad) dressed with rice vinegar
- Blanched spinach with a sesame dressing (Gomae)
Frequently Asked Questions
Oyakodon Japanese Chicken and Egg Rice Bowl Recipe
Ingredients
Method
- Prepare the Sauce: In a medium-sized frying pan (about 20-24cm is ideal), combine the dashi stock, soy sauce, mirin, sake, and caster sugar. Place the pan over a medium heat and stir gently until the sugar has completely dissolved. Bring the mixture to a gentle simmer.
- Cook the Onions: Add the thinly sliced onion to the simmering sauce. Spread them out in an even layer. Let the onions cook for about 3-4 minutes, or until they have softened and become translucent. They will absorb the delicious flavours of the broth.
- Simmer the Chicken: Add the bite-sized chicken pieces to the pan, nestling them amongst the onions in a single layer. Reduce the heat slightly to maintain a steady, gentle simmer. Cook for 6-8 minutes, turning the chicken pieces once halfway through, until the chicken is cooked through and opaque.
- Prepare the Egg: While the chicken is cooking, crack the 3 eggs into a small bowl. Use a fork or chopsticks to beat them lightly. You don’t want a perfectly uniform yellow mixture; aim for streaks of white and yolk to remain. This creates a more interesting texture in the finished dish.
- Add the Egg: Once the chicken is cooked, increase the heat back to medium. Pour the beaten egg mixture evenly over the chicken and onions. Try to cover as much of the surface as possible. I like to pour about two-thirds of the egg in first, let it set slightly, then drizzle the remaining third over the top.
- Cook to Perfection: Let the egg cook for 1-2 minutes. The edges should be set, but the centre should still be slightly runny and custardy. The residual heat will continue to cook it after you remove it from the heat. As soon as it reaches this stage, immediately remove the pan from the heat.
- Assemble the Bowls: Fill two deep bowls with the hot cooked rice. Carefully slide one half of the chicken and egg mixture from the pan directly over the top of the rice in each bowl.
- Garnish and Serve: Garnish your Oyakodon generously with the sliced spring onions and a sprinkle of mitsuba or coriander if you’re using it. A dash of shichimi togarashi adds a lovely, subtle heat. Serve immediately and enjoy.
Notes
There you have it – a straightforward path to a truly satisfying and flavourful meal. This Oyakodon Japanese Chicken and Egg Rice Bowl recipe is proof that you don’t need a long list of ingredients or complicated techniques to create something special. I make this at least once a week – it’s become a family favourite. I hope it finds a cherished spot in your recipe collection too. Please let me know how you get on in the comments below!