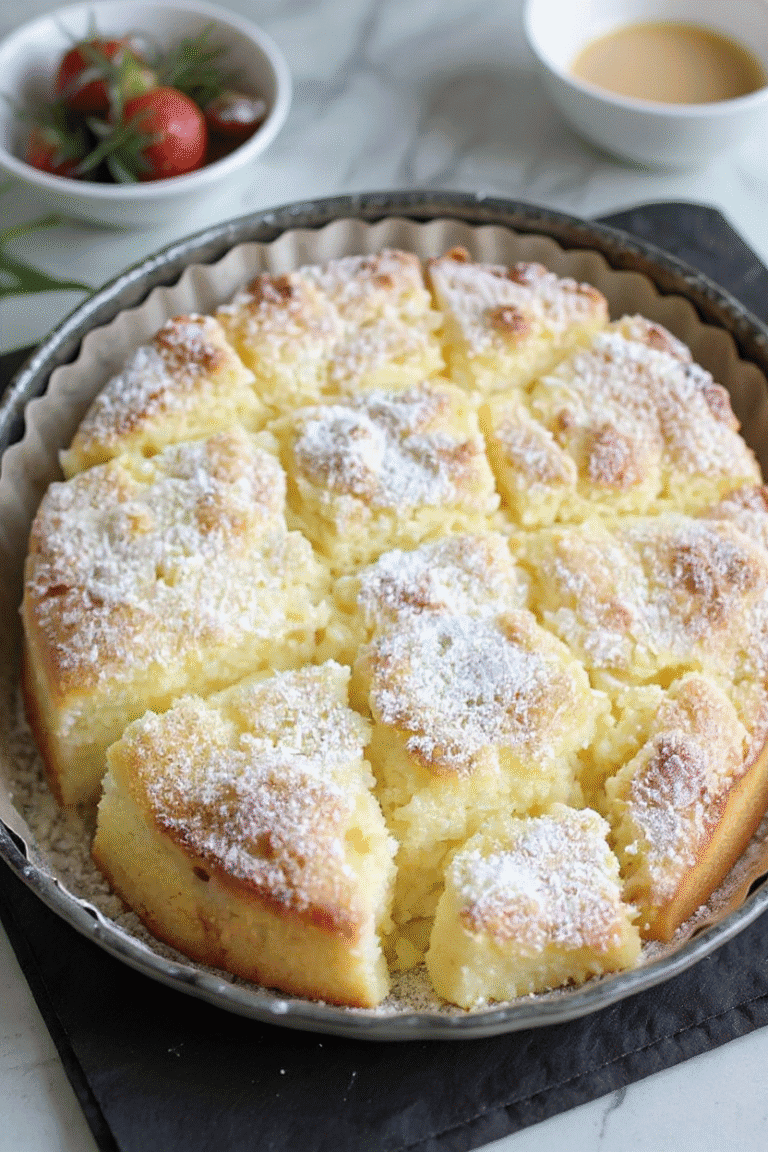
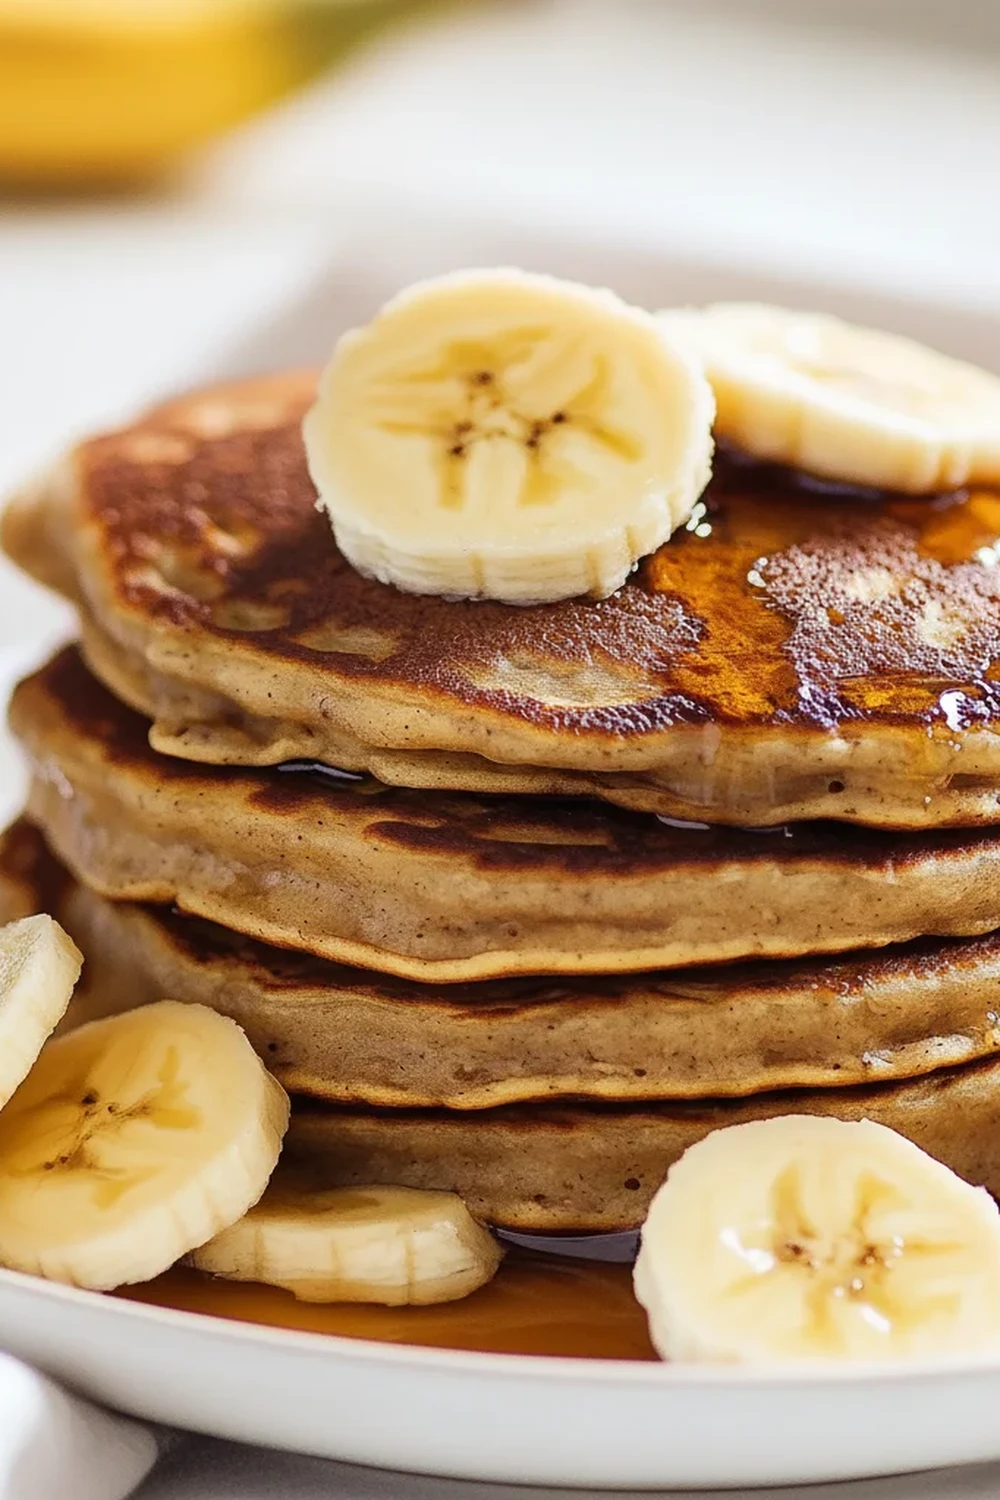
Fluffy Banana and Oats Pancakes for Morning
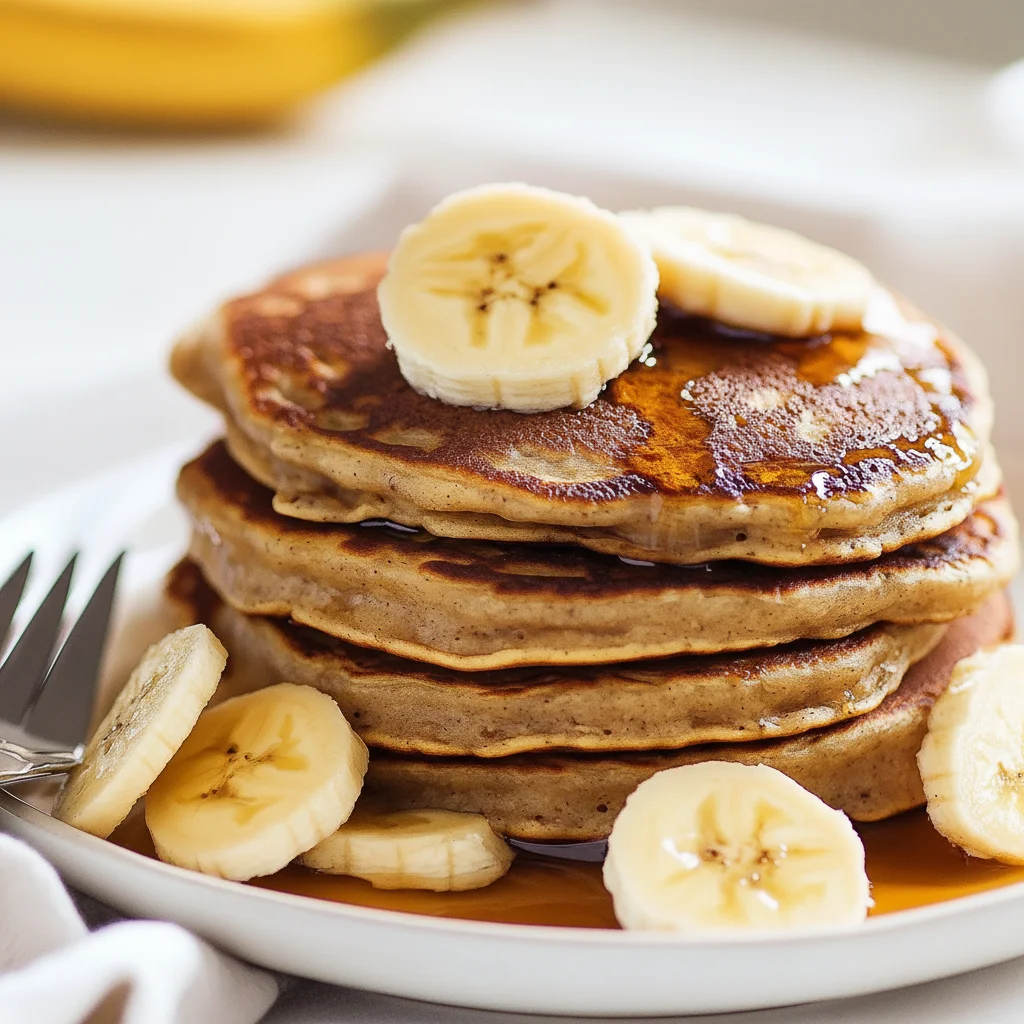
There’s something wonderfully comforting about the smell of pancakes cooking on a weekend morning. It’s a slow, gentle start to the day that promises good things. These Banana and Oats Pancakes are my go-to recipe for those moments. They’re not your typical light and airy café-style pancakes; instead, they are substantial, wholesome, and packed with a gentle, natural sweetness that feels both indulgent and nourishing. The oats give them a fantastic, slightly chewy texture and a heartiness that keeps you satisfied until lunchtime.
What I adore about this recipe is how it transforms simple, everyday ingredients into something truly special. The magic lies in using very ripe, spotty bananas – the kind you might otherwise overlook. Their concentrated sweetness means you need very little added sugar, letting the fruit and nutty oats really shine. My kids absolutely devour this every time I make it, and I feel good knowing they’re getting a nutritious start to the day with all that fruit and fibre. It’s a straightforward recipe that works beautifully for a relaxed family breakfast or a lazy brunch.
While we love a good savoury meal like my Lemon Garlic Chicken during the week, a truly special breakfast sets the tone for the weekend. These pancakes manage to feel like a treat while being packed with goodness, making them a staple in our home. We’ll be walking you through every step to make them perfectly every time.
Recipe Overview
These Banana and Oats Pancakes have a soft, slightly dense, and wonderfully moist texture from the mashed banana and softened oats. The flavour is dominated by a deep, caramel-like banana sweetness, complemented by the nutty, wholesome taste of oats and a gentle warmth from a hint of cinnamon. After testing various resting times for the batter, I found that just 10 minutes makes a remarkable difference, allowing the oats to hydrate and ensuring the pancakes are tender rather than tough.
- Prep Time: 10 minutes
- Cook Time: 15 minutes
- Total Time: 25 minutes
- Servings: Makes 8-10 pancakes (serves 3-4 people)
- Difficulty: Easy
Why You’ll Love These Banana and Oats Pancakes
- Genuine Flavour: The overripe bananas provide a deep, natural sweetness that is perfectly balanced by the earthy flavour of the rolled oats. It’s a taste that is both comforting and satisfyingly complex.
- Ready in Under 30 Minutes: From gathering your ingredients in the kitchen to stacking warm pancakes on a plate, this entire recipe comes together in about 25 minutes.
- Flexible Recipe: This recipe is a fantastic base for customisation. You can easily stir in 75g of dark chocolate chips, a handful of fresh blueberries, or some chopped pecans for extra texture.
- Ideal for Weekend Brunch: These pancakes are just the thing for a slow Saturday morning. They feel special enough for guests but are simple enough for a regular family breakfast.
- Family Tested: This recipe always gets compliments in my house. My youngest loves to help mash the bananas, and everyone has their favourite topping – from maple syrup to a dollop of Greek yoghurt.
Ingredients You’ll Need
You likely have most of these ingredients in your pantry and fridge already. For the oats, I always use standard rolled oats (sometimes called old-fashioned oats) as they provide the best texture – not too coarse, not too fine. I find brands like Quaker work consistently well for this.
- 130g rolled oats
- 130g plain flour
- 2 tsp baking powder
- ½ tsp bicarbonate of soda
- ½ tsp ground cinnamon
- ¼ tsp salt
- 2 large, very ripe bananas (the spottier, the better!)
- 2 large free-range eggs
- 240ml whole milk (or buttermilk for extra tang)
- 1 tsp vanilla extract
- 30g unsalted butter, melted, plus extra for cooking
Sara’s Tip: Don’t be tempted to use under-ripe bananas. The flavour and sweetness of these pancakes come almost entirely from very ripe, brown-spotted bananas. They mash more easily and contribute a much deeper, caramelised flavour.
How to Make Banana and Oats Pancakes
The process for making these pancakes is very straightforward. The most important part is not to overmix the batter – a few lumps are perfectly fine and are the secret to a tender texture.
- Combine Dry Ingredients: In a large mixing bowl, whisk together the rolled oats, plain flour, baking powder, bicarbonate of soda, ground cinnamon, and salt. Mixing them thoroughly now ensures the leavening agents are evenly distributed.
- Prepare the Wet Ingredients: In a separate, medium-sized bowl, peel and mash the ripe bananas with a fork until they are mostly smooth with a few small lumps remaining.
- Mix Wet Ingredients: To the mashed bananas, add the eggs, milk, and vanilla extract. Whisk everything together until it’s well combined. Then, slowly whisk in the melted butter.
- Combine Wet and Dry: Pour the wet banana mixture into the bowl of dry ingredients. Gently fold them together with a spatula until just combined. Be careful not to overmix; a few lumps in the batter are what you want.
- Rest the Batter: This is a key step! Let the batter sit at room temperature for 10-15 minutes. This allows the oats to absorb some of the liquid and soften. What works best for me is using this time to get my frying pan ready and gather my toppings.
- Heat the Pan: Place a large, non-stick frying pan or griddle over a medium-low heat. Add a small knob of butter or a little oil and let it melt to coat the surface. The pan is ready when a drop of water sizzles and evaporates on contact.
- Cook the Pancakes: Pour about 60ml (a ¼ cup measure works well) of batter onto the hot pan for each pancake. Cook for 2-3 minutes on the first side, or until you see small bubbles appearing on the surface and the edges look set and golden.
- Flip and Finish: Carefully flip the pancakes with a thin spatula and cook for another 1-2 minutes on the other side, until golden brown and cooked through.
- Keep Warm: Transfer the cooked pancakes to a plate and keep them warm in a low oven (around 100°C) while you cook the remaining batter, adding a little more butter to the pan between batches as needed.
Tips From My Kitchen
- Temperature Control: The key to evenly cooked pancakes is a consistent medium-low heat. If the pan is too hot, the outside will darken too quickly, leaving the oaty centre raw. If it’s too low, they won’t get that lovely golden colour.
- The Secret Step: I learned that resting the batter is non-negotiable for oat-based pancakes. It gives the gluten in the flour time to relax and, more importantly, allows the oats to fully hydrate. This simple pause creates a much softer, more cohesive pancake.
- Make-Ahead: You can mix the dry ingredients together and store them in an airtight container for weeks. When you’re ready for pancakes, you just need to mix in the wet ingredients.
- Storage: Cooled pancakes can be stored in an airtight container in the fridge for up to 3 days. They reheat beautifully in a toaster or for a few seconds in the microwave.
Equipment You’ll Need
- Large non-stick frying pan or griddle
- Large and medium mixing bowls
- Whisk
- Silicone spatula
- Measuring cups and spoons
Common Mistakes to Avoid
- Overcrowding the pan: It’s tempting to cook as many pancakes as possible at once, but this lowers the pan’s temperature and makes them steam rather than fry. Cook in batches of 2 or 3 to give them space and ensure a golden-brown finish.
- Wrong temperature: If your butter is smoking, the pan is far too hot. Let it cool down a little. A correctly heated pan will melt butter until it foams gently.
- Skipping the rest time: If you skip the 10-minute rest, you’ll find the batter is thinner and the final pancakes have a slightly gritty texture from the uncooked oats. Patience here pays off!
Delicious Variations to Try
This recipe is a wonderful canvas for other flavours. Here are a few variations we love in our house:
- Nutty Crunch Version: Add 75g of chopped toasted pecans or walnuts to the batter for a fantastic textural contrast to the soft pancake.
- Vegan Banana Oats Pancakes: For a plant-based version, use a flax egg (1 tbsp ground flaxseed mixed with 3 tbsp water, left to sit for 5 minutes), swap the milk for oat or almond milk, and use melted coconut oil instead of butter.
- Fruity Addition: Gently fold a handful of fresh blueberries or raspberries into the batter just before cooking. Be gentle so you don’t burst them all!
What to Serve With Banana and Oats Pancakes
These pancakes are delightful on their own, but the right toppings can elevate them further. If you’re planning a full brunch spread, they work well with savoury items too.
- Classic Toppings: A drizzle of pure maple syrup and some extra sliced banana is a timeless combination that never fails.
- Creamy & Crunchy: A large dollop of tangy Greek yoghurt or coconut yoghurt, a sprinkle of granola, and a few toasted seeds add wonderful texture and balance the sweetness.
- Savoury Side: Serve alongside some crispy streaky bacon or grilled sausages for a fantastic sweet-and-salty contrast. It’s a pairing that reminds me of a full American-style breakfast.
- Drink Pairing: A freshly brewed coffee, a pot of tea, or a tall glass of cold milk all work wonderfully.
Frequently Asked Questions
Banana and Oats Pancakes
Ingredients
Method
- Combine Dry Ingredients: In a large mixing bowl, whisk together the rolled oats, plain flour, baking powder, bicarbonate of soda, ground cinnamon, and salt. Mixing them thoroughly now ensures the leavening agents are evenly distributed.
- Prepare the Wet Ingredients: In a separate, medium-sized bowl, peel and mash the ripe bananas with a fork until they are mostly smooth with a few small lumps remaining.
- Mix Wet Ingredients: To the mashed bananas, add the eggs, milk, and vanilla extract. Whisk everything together until it's well combined. Then, slowly whisk in the melted butter.
- Combine Wet and Dry: Pour the wet banana mixture into the bowl of dry ingredients. Gently fold them together with a spatula until just combined. Be careful not to overmix; a few lumps in the batter are what you want.
- Rest the Batter: This is a key step! Let the batter sit at room temperature for 10-15 minutes. This allows the oats to absorb some of the liquid and soften. What works best for me is using this time to get my frying pan ready and gather my toppings.
- Heat the Pan: Place a large, non-stick frying pan or griddle over a medium-low heat. Add a small knob of butter or a little oil and let it melt to coat the surface. The pan is ready when a drop of water sizzles and evaporates on contact.
- Cook the Pancakes: Pour about 60ml (a ¼ cup measure works well) of batter onto the hot pan for each pancake. Cook for 2-3 minutes on the first side, or until you see small bubbles appearing on the surface and the edges look set and golden.
- Flip and Finish: Carefully flip the pancakes with a thin spatula and cook for another 1-2 minutes on the other side, until golden brown and cooked through.
- Keep Warm: Transfer the cooked pancakes to a plate and keep them warm in a low oven (around 100°C) while you cook the remaining batter, adding a little more butter to the pan between batches as needed.
Notes
I really hope these Banana and Oats Pancakes bring a little warmth and joy to your breakfast table. They are a testament to how simple, wholesome ingredients can create something truly satisfying. After you’ve given them a try, I’d love it if you could leave a comment below to let me know how they turned out for you! Happy cooking.
All the best,
Sara Gomez