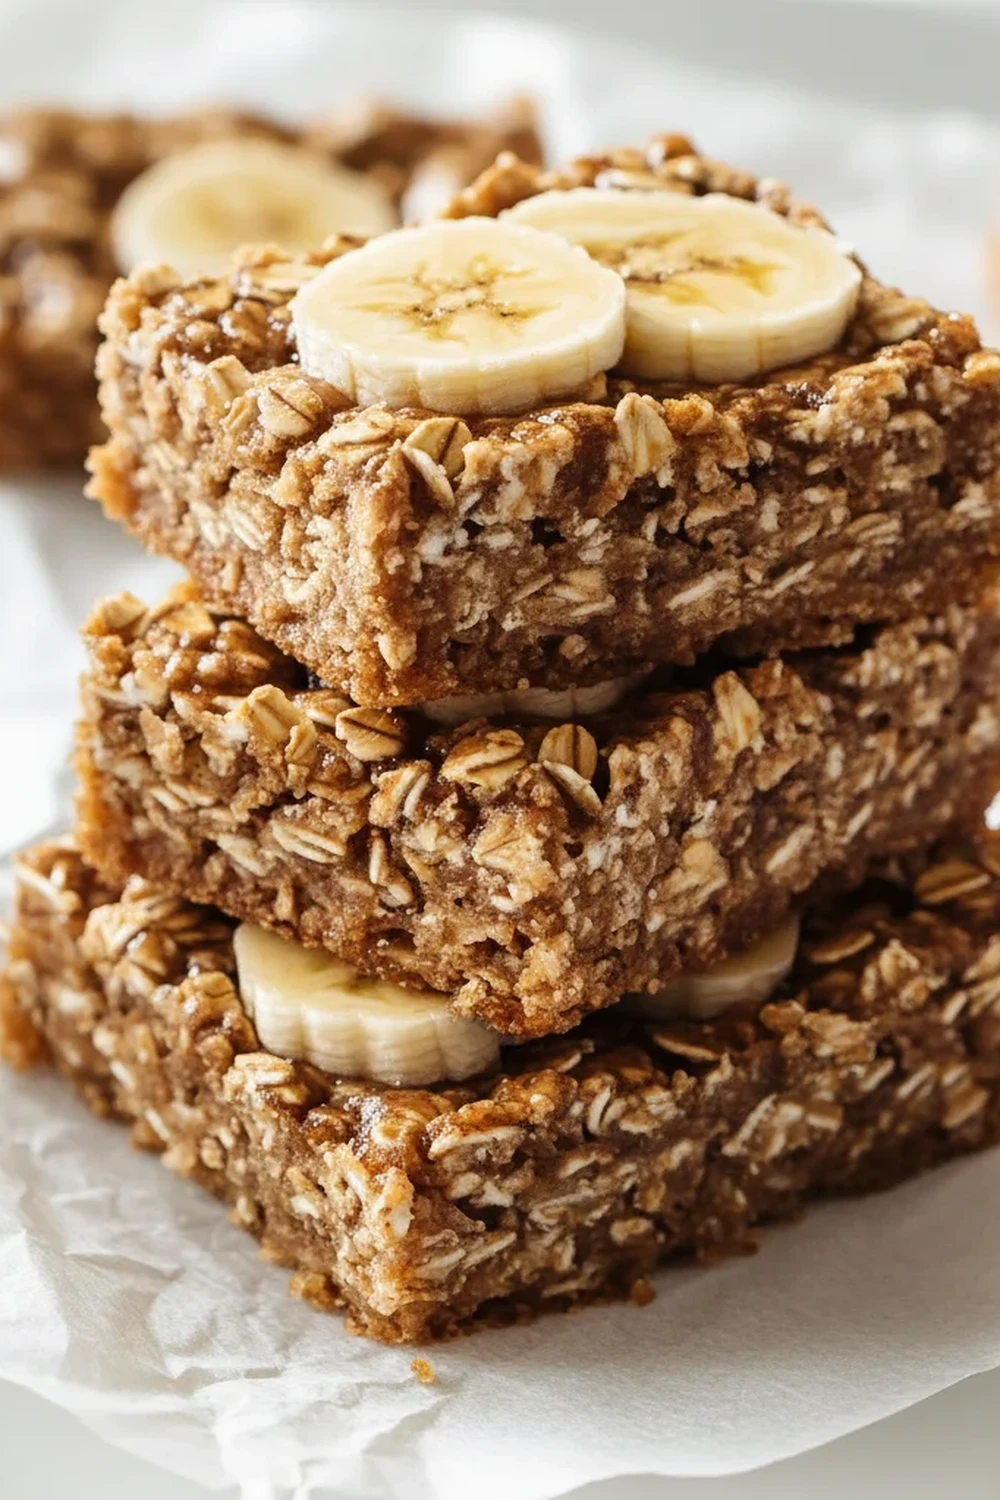
Chewy Banana Oat Breakfast Bars Recipe to Bake
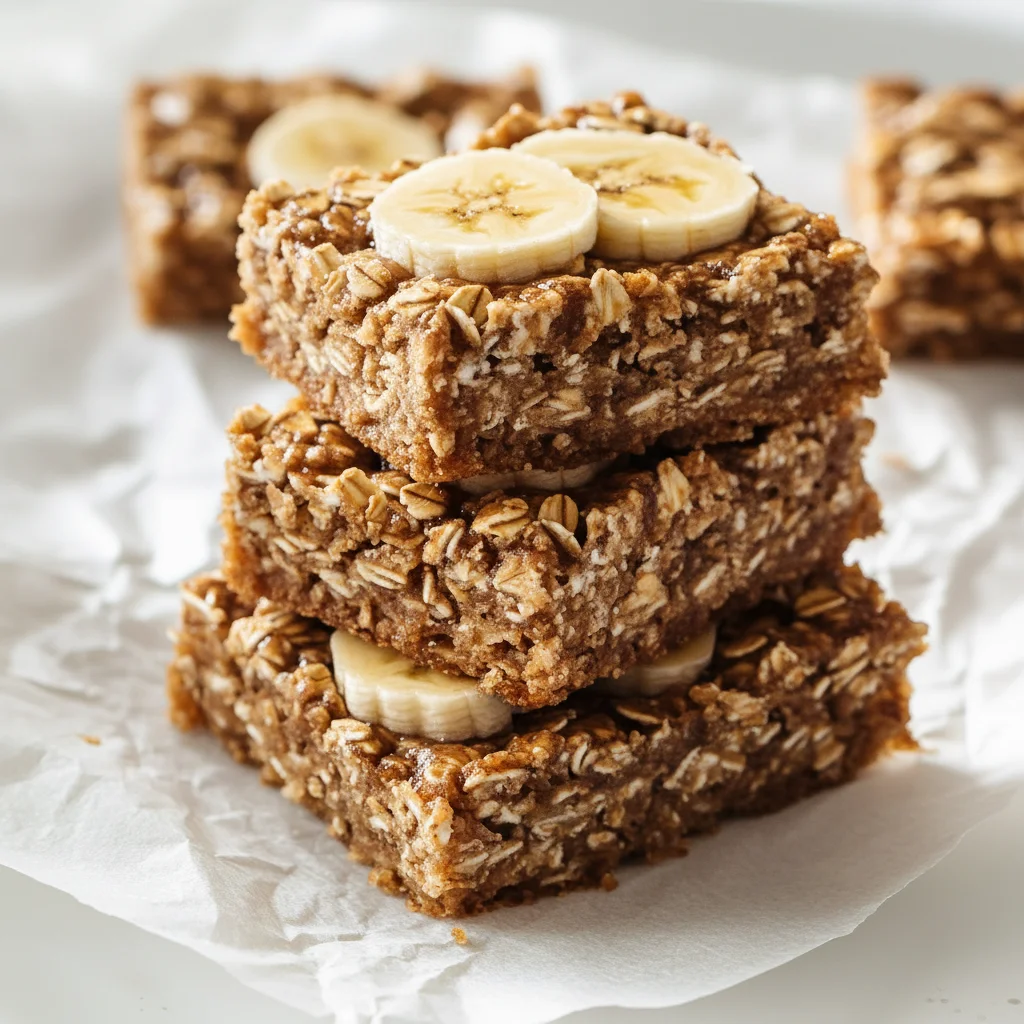
There’s something deeply satisfying about a homemade breakfast bar, especially one that sidesteps the excessive sugar of shop-bought versions. My mornings are often a whirlwind of activity, and having a batch of these Chewy Banana Oat Breakfast Bars ready to go has been a genuine game-changer. They’re substantial, packed with slow-release energy from the oats, and have a wonderfully soft, chewy texture that feels like a proper treat. The inspiration for the texture came from a particularly good flapjack I had at a tiny cafe while hiking in the Peak District; it was dense and moist, not at all dry, and I was determined to recreate that feeling at home.
What makes this Chewy Banana Oat Breakfast Bars Recipe so special is the way the ripe bananas melt into the mixture, providing natural sweetness and incredible moisture. We’re not just adding banana flavour; the banana becomes the very foundation of the bar. It binds everything together, creating a texture that’s part-cake, part-flapjack, and entirely delicious. The subtle warmth from the cinnamon and the nutty depth of the oats round everything out beautifully.
This recipe is ideal for anyone looking for a wholesome, make-ahead breakfast or snack. They work wonderfully for busy parents trying to get something nutritious into their children before school, for anyone needing a post-gym refuel, or simply for a satisfying afternoon snack with a cup of tea. They come together with minimal fuss and make the whole house smell incredible while they bake.
Recipe Overview
This recipe delivers wonderfully soft, dense, and chewy breakfast bars. The primary flavour is sweet, ripe banana, supported by wholesome oats and a gentle hint of cinnamon. They hold their shape perfectly for a grab-and-go breakfast but remain incredibly moist. After a few early attempts, I found that pressing the mixture firmly into the tin is the most critical step for achieving that perfect, non-crumbly texture.
- Prep Time: 15 minutes
- Cook Time: 25 minutes
- Total Time: 40 minutes (+ cooling)
- Servings: 16 bars
- Difficulty: Easy
Why You’ll Love This Chewy Banana Oat Breakfast Bars Recipe
- Genuine Flavour: These bars taste of real ingredients. The sweetness comes from deeply ripened bananas and a touch of honey, not refined sugar, allowing the nutty flavour of the rolled oats to shine through.
- Ready in Under an Hour: You can get these mixed, baked, and cooling on the counter in about 40 minutes, making it a brilliant recipe for a Sunday afternoon batch-baking session.
- Flexible Recipe: This is a fantastic base recipe. You can stir in a handful of dark chocolate chips for a touch of indulgence, add chopped walnuts or pecans for extra crunch, or toss in some pumpkin seeds for a nutritional boost.
- Great for On-the-Go Mornings: They are sturdy enough to be wrapped up and tucked into a bag for a commute, a school lunchbox, or a pre-workout snack, providing sustained energy when you need it most.
- Family Tested: This recipe always gets compliments in my house. My husband, who’s usually picky about oat-based snacks, asked for a second one straight away!
Ingredients You’ll Need
For this recipe, the riper your bananas, the better. I’m talking about the sad-looking ones with plenty of black spots – they are packed with sugar and moisture, which is exactly what we need. I always use proper rolled oats, not the instant kind, as they provide a much better chewy texture. Quaker Oats are my go-to for consistency.
- 3 large, very ripe bananas (about 400g, unpeeled)
- 1 large free-range egg
- 80ml runny honey (or maple syrup)
- 60ml melted coconut oil (or unsalted butter)
- 1 tsp vanilla extract
- 200g rolled oats (not instant)
- 120g plain flour
- 1 tsp baking powder
- ½ tsp ground cinnamon
- ¼ tsp salt
- Optional Add-ins: 75g dark chocolate chips, chopped nuts (walnuts or pecans), or seeds (pumpkin or sunflower)
Sara’s Tip: If your coconut oil is solid, just pop it in a microwave-safe bowl and heat it in 15-second bursts until it’s completely liquid. Let it cool for a minute before adding it to the egg to avoid scrambling it.
How to Make Chewy Banana Oat Breakfast Bars
This process is wonderfully straightforward. We’ll start by combining the wet ingredients, then fold in the dry. The most important part is ensuring everything is well combined without overmixing the flour.
- Preheat and Prepare: First things first, preheat your oven to 180°C (160°C fan). Grease a 20cm (8-inch) square baking tin and line it with baking parchment, leaving a little overhang on two sides to act as handles. This will make lifting the bars out later much easier.
- Mash the Bananas: In a large mixing bowl, peel the ripe bananas and mash them thoroughly with a fork. You want them to be very well broken down, almost like a purée, with only a few small lumps remaining.
- Combine Wet Ingredients: To the mashed bananas, add the egg, runny honey, melted coconut oil, and vanilla extract. Whisk everything together until it’s smooth and fully combined.
- Combine Dry Ingredients: In a separate medium-sized bowl, stir together the rolled oats, plain flour, baking powder, ground cinnamon, and salt. Give it a good mix to ensure the baking powder and cinnamon are evenly distributed.
- Fold Everything Together: Pour the dry ingredients into the bowl with the wet banana mixture. Using a spatula, gently fold everything together until just combined. Be careful not to overmix; stop as soon as you no longer see dry streaks of flour.
- Add Your Extras (Optional): If you’re using any add-ins like chocolate chips or nuts, now is the time to gently fold them into the batter.
- Press into the Tin: Scrape the mixture into your prepared baking tin. This next step is key! Use the back of your spatula or a spoon to spread the batter evenly and press it down firmly into the corners and across the entire surface. This compaction is what helps the bars hold together so well. What works best for me is using a second piece of parchment on top to press down without getting my hands sticky.
- Bake to Perfection: Place the tin in the preheated oven and bake for 22-25 minutes. The bars are ready when the edges are turning a lovely golden brown and a skewer inserted into the centre comes out clean or with a few moist crumbs attached.
- Cool Completely: This is a crucial step for clean slices! Leave the bars to cool completely in the tin on a wire rack. This allows them to set fully. If you try to cut them while warm, they will likely crumble.
- Slice and Serve: Once completely cool, use the parchment paper handles to lift the entire block out of the tin. Place it on a cutting board and use a sharp knife to cut it into 16 squares.
Tips From My Kitchen
- Ripe Banana Power: The success of this recipe hinges on the ripeness of your bananas. They should be heavily speckled with black or even mostly black. This ensures maximum natural sweetness and moisture, reducing the need for lots of added sugar.
- The Secret Step: Don’t be shy when pressing the mixture into the tin. A firm, even pressure across the surface compacts the oats and batter, which is the secret to a bar that is chewy and dense, not airy or crumbly. I learned that after my first batch fell apart!
- Make-Ahead: You can mix the dry ingredients (oats, flour, baking powder, cinnamon, salt) and store them in an airtight container for up to a month. When you’re ready to bake, you just need to mash the bananas and mix in the wet ingredients.
- Storage: These bars will keep beautifully in an airtight container at room temperature for up to 3-4 days. If you want them to last a bit longer, you can store them in the fridge for up to a week.
Equipment You’ll Need
- Large mixing bowl
- Medium mixing bowl
- 20cm (8-inch) square baking tin
- Baking parchment
- Whisk and a spatula or wooden spoon
- Wire cooling rack
Common Mistakes to Avoid
- Using Under-ripe Bananas: Green or perfectly yellow bananas lack the sweetness and moisture needed here. Using them will result in a drier, less flavourful bar that requires more added sweetener. Wait until they are deeply spotted.
- Overbaking the Bars: It’s tempting to leave them in until they’re dark brown, but this will dry them out and make them hard instead of chewy. Take them out when the edges are golden and the centre is set. They will continue to firm up as they cool.
- Cutting Them While Warm: I know it’s hard to wait when your kitchen smells so good, but patience is essential. The bars need to cool completely in the tin to finish setting. Cutting them warm will cause them to fall apart.
What to Serve With Chewy Banana Oat Breakfast Bars
These bars are fantastic on their own, but they can also be dressed up. They are a great alternative to some of my more savoury options like this Low Carb Chicken Casserole when you need something quick in the morning.
- Greek Yoghurt: A dollop of plain Greek yoghurt on top adds a lovely tangy creaminess that contrasts beautifully with the sweet banana.
- Nut Butter: For an extra boost of protein and flavour, a smear of peanut, almond, or cashew butter is absolutely delicious.
- A Hot Drink: These are the ideal accompaniment to your morning coffee or a comforting cup of tea in the afternoon.
Frequently Asked Questions
Chewy Banana Oat Breakfast Bars Recipe
Ingredients
Method
- Preheat and Prepare: First things first, preheat your oven to 180°C (160°C fan). Grease a 20cm (8-inch) square baking tin and line it with baking parchment, leaving a little overhang on two sides to act as handles. This will make lifting the bars out later much easier.
- Mash the Bananas: In a large mixing bowl, peel the ripe bananas and mash them thoroughly with a fork. You want them to be very well broken down, almost like a purée, with only a few small lumps remaining.
- Combine Wet Ingredients: To the mashed bananas, add the egg, runny honey, melted coconut oil, and vanilla extract. Whisk everything together until it's smooth and fully combined.
- Combine Dry Ingredients: In a separate medium-sized bowl, stir together the rolled oats, plain flour, baking powder, ground cinnamon, and salt. Give it a good mix to ensure the baking powder and cinnamon are evenly distributed.
- Fold Everything Together: Pour the dry ingredients into the bowl with the wet banana mixture. Using a spatula, gently fold everything together until just combined. Be careful not to overmix; stop as soon as you no longer see dry streaks of flour.
- Add Your Extras (Optional): If you’re using any add-ins like chocolate chips or nuts, now is the time to gently fold them into the batter.
- Press into the Tin: Scrape the mixture into your prepared baking tin. This next step is key! Use the back of your spatula or a spoon to spread the batter evenly and press it down firmly into the corners and across the entire surface. This compaction is what helps the bars hold together so well. What works best for me is using a second piece of parchment on top to press down without getting my hands sticky.
- Bake to Perfection: Place the tin in the preheated oven and bake for 22-25 minutes. The bars are ready when the edges are turning a lovely golden brown and a skewer inserted into the centre comes out clean or with a few moist crumbs attached.
- Cool Completely: This is a crucial step for clean slices! Leave the bars to cool completely in the tin on a wire rack. This allows them to set fully. If you try to cut them while warm, they will likely crumble.
- Slice and Serve: Once completely cool, use the parchment paper handles to lift the entire block out of the tin. Place it on a cutting board and use a sharp knife to cut it into 16 squares.
Notes
I really hope you enjoy making this Chewy Banana Oat Breakfast Bars Recipe. They’ve become such a staple in our home for busy mornings and healthy snacking. There’s nothing better than knowing you have a batch of these wholesome treats waiting for you. If you give them a try, I’d love to hear how they turned out for you in the comments below! Happy baking, Sara.