Authentic Korean BBQ Grilling Guide for Home
There’s something uniquely social and utterly satisfying about the sizzle and aroma of a Korean BBQ. It’s more than just a meal; it’s an experience. The rich, savoury-sweet scent of marinated meat hitting a hot grill instantly transports me back to bustling restaurants in Seoul, but recreating that magic at home is surprisingly straightforward. This is my go-to recipe when I need something that feels special for a weekend dinner, but doesn’t require hours of complex cooking. We’re going to focus on Bulgogi, a classic Korean BBQ dish featuring thinly sliced, marinated beef that cooks in minutes.
What makes this particular recipe so wonderful is the marinade. It’s a beautifully balanced blend of soy sauce, sweet pear, fragrant garlic, and nutty sesame oil. The pear not only adds a delicate sweetness but also contains enzymes that tenderise the beef, making it gloriously soft and succulent. When cooked over high heat, the sugars in the marinade caramelise on the edges of the beef, creating an irresistible crust that contrasts with the tender meat. It’s a dynamic dish that works beautifully for a lively dinner with friends or a flavour-packed family meal.
Whether you’re new to Korean cooking or a seasoned enthusiast, this recipe is for you. We’ll walk through everything from choosing the right cut of beef to getting that perfect sear. The result is a dish that always gets compliments and has everyone reaching for a second helping. Let’s get the grill fired up and create a memorable meal together.
Recipe Overview
This Korean BBQ recipe focuses on creating deeply flavourful and tender Bulgogi beef. The star is the marinade, which infuses the meat with a perfect balance of salty, sweet, and umami notes. The beef is sliced paper-thin, allowing it to cook in a matter of minutes and soak up all the delicious flavour. I’ve found through testing that while an overnight marinade yields the most tender results, even 30 minutes gives you a fantastic flavour for those times you’re short on time.
- Prep Time: 20 minutes
- Marinating Time: 1 hour (or up to 24 hours)
- Cook Time: 10 minutes
- Total Time: 1 hour 30 minutes
- Servings: 4 people
- Difficulty: Easy
Why You’ll Love This Korean BBQ
- Genuine Flavour: We use authentic ingredients like Asian pear and sesame oil to create a marinade that is genuinely savoury and sweet, with a deep umami character from the soy sauce and a gentle warmth from fresh ginger and garlic.
- Comes Together in Under 30 Minutes: Once the meat is marinated, the active cooking time is incredibly short. You can have this spectacular main dish on the table in less time than it takes to order a takeaway.
- Flexible Recipe: You can easily adjust the sweetness by using more or less brown sugar. Don’t have a pear? A kiwi or even a sweet apple works in a pinch to tenderise the meat.
- Great for Social Gatherings: This dish is brilliant for a ‘cook-at-the-table’ experience with a portable grill, or you can simply cook it in the kitchen and serve it family-style. It always feels festive.
- Family Tested: My family adores this recipe. The slightly sweet flavour profile is a huge hit with the kids, and my husband loves wrapping the beef in crisp lettuce leaves with a dollop of spicy gochujang.
Ingredients You’ll Need
For the best results, try to find a well-marbled cut of beef like sirloin or ribeye. The fat renders during cooking, keeping the meat juicy and flavourful. I always opt for a naturally brewed soy sauce like Kikkoman, as its flavour is less harsh than chemically produced versions.
- 700g sirloin or ribeye steak, very thinly sliced
- 1 medium onion, thinly sliced
- 2 spring onions, chopped, for garnish
- 1 tbsp toasted sesame seeds, for garnish
- For the Marinade:
- 120ml soy sauce (low sodium is a good choice)
- 1 small Asian pear (or Bosc pear), peeled, cored, and roughly chopped
- 4 cloves garlic, minced
- 1 tbsp fresh ginger, grated
- 2 tbsp brown sugar
- 2 tbsp sesame oil
- 1 tbsp mirin (or rice wine)
- 1/2 tsp black pepper
Sara’s Tip: To get those paper-thin slices of beef, pop the steak in the freezer for about 30-45 minutes. It will firm up just enough to make slicing against the grain much easier and safer.
How to Make Korean BBQ
The process is all about the marinade. Once that’s done, the cooking part is very fast, so make sure you have all your ingredients ready to go before you turn on the heat. We want a really good sizzle as soon as the meat hits the pan.
- Prepare the Marinade: In a blender, combine the chopped pear, soy sauce, minced garlic, grated ginger, brown sugar, sesame oil, mirin, and black pepper. Blend until the pear is completely puréed and the mixture is smooth.
- Slice the Beef: If you haven’t already, slice your partially frozen beef as thinly as possible against the grain. This is a crucial step for achieving tender Bulgogi.
- Marinate the Beef: Place the sliced beef and sliced onions in a large bowl or a reusable silicone bag. Pour the marinade over the top and use your hands to gently massage it into the meat, ensuring every piece is well-coated.
- Let it Rest: Cover the bowl and refrigerate for at least 1 hour, or ideally overnight for the best flavour and texture. The longer it marinates, the more tender the beef will become.
- Prepare for Cooking: When you’re ready to cook, remove the beef from the fridge and let it sit at room temperature for about 20 minutes. This helps it cook more evenly.
- Cook the Beef: Heat a large cast-iron skillet, grill pan, or BBQ over a high heat. You want it to be very hot. Add a tiny splash of neutral oil. What works best for me is cooking the beef in small batches to avoid overcrowding the pan, which would steam the meat instead of searing it.
- Get a Good Sear: Place a single layer of beef in the hot pan. Let it cook for 1-2 minutes per side, until it’s beautifully caramelised and cooked through. The thin slices cook very quickly!
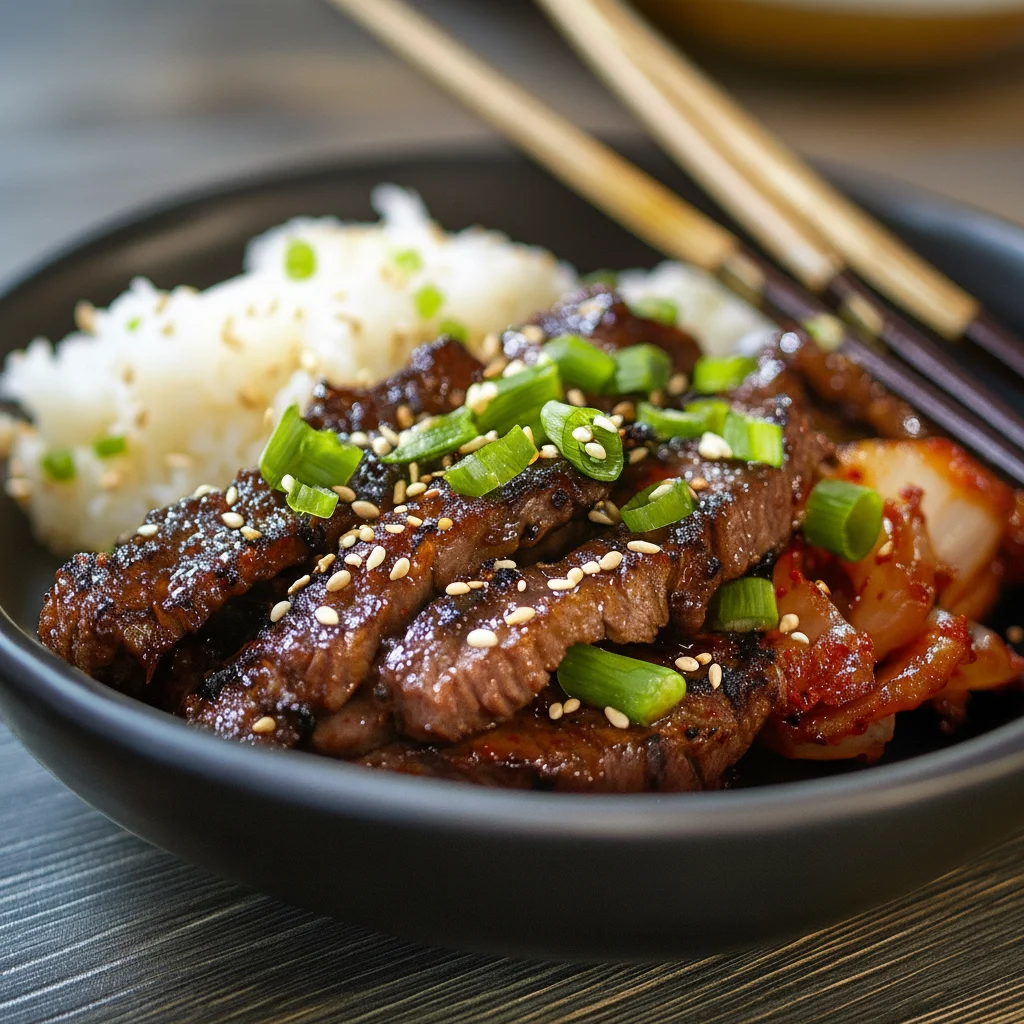
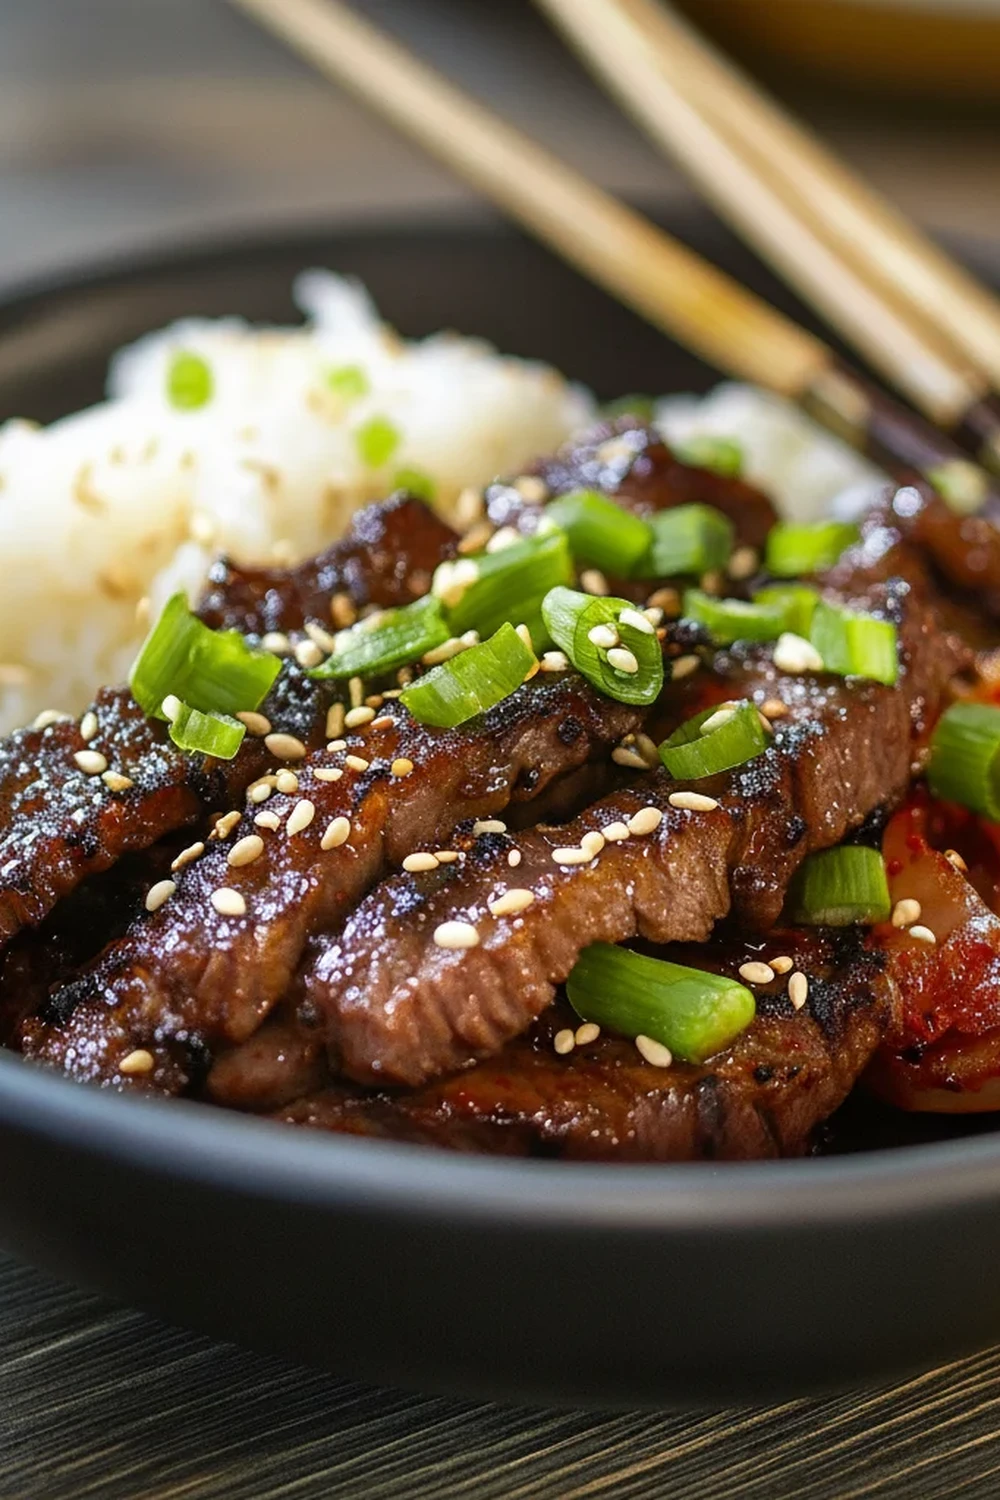
- Serve Immediately: As each batch is cooked, transfer it to a serving platter. Garnish the finished dish with chopped spring onions and toasted sesame seeds. Serve hot with your favourite sides.
Tips From My Kitchen
- Temperature Control: The key to a great sear is high, consistent heat. Don’t be tempted to add the meat until your pan is properly preheated. You should hear a loud sizzle the moment the meat touches the surface.
- The Secret Step: Don’t discard the onions from the marinade! I learned that cooking them alongside the beef adds another layer of sweet, caramelised flavour to the final dish. They get wonderfully soft and jammy.
- Make-Ahead: The marinade can be made up to 3 days in advance and kept in an airtight container in the fridge. You can also marinate the beef for up to 24 hours, making it an excellent dish to prep the day before a gathering.
- Storage: Leftovers can be stored in an airtight container in the refrigerator for up to 3 days. Reheat gently in a pan or microwave, but be careful not to overcook it.
Equipment You’ll Need
- Grill or large cast-iron pan
- Blender (for the marinade)
- Tongs
- Large mixing bowl
Common Mistakes to Avoid
- Overcrowding the pan: Tipping all the meat into the pan at once will lower the temperature, causing the meat to steam in its own juices. This prevents the sugars from caramelising and you won’t get those delicious crispy edges. Cook in batches for the best results.
- Wrong temperature: Cooking on a medium or low heat will result in grey, tough meat. You need a high heat to quickly sear the outside, locking in the juices and creating that characteristic Korean BBQ char.
- Not slicing thinly enough: Thick slices of meat will take longer to cook and won’t be as tender. Taking the time to freeze the steak slightly and slice it thinly is well worth the effort.
Delicious Variations to Try
Once you’ve mastered the basic recipe, it’s fun to experiment. The marinade is a fantastic base for all sorts of proteins and flavour profiles.
- Spicy Version: Add 1-2 tablespoons of Gochujang (Korean chilli paste) to the marinade for a wonderful spicy and funky depth of flavour. Adjust the amount to your preferred heat level.
- Vegetarian/Vegan Option: This marinade works beautifully with firm tofu or mushrooms. Press the tofu well, slice it into steaks, and marinate for at least 2 hours. For mushrooms, Portobello or King Oyster varieties are fantastic.
- Different Protein: Try this with thinly sliced pork shoulder for Dwaeji Bulgogi. It’s equally delicious. For a different flavour altogether, you might enjoy my Sweet Chili Chicken Recipe, which offers a similar sweet and savoury profile.
What to Serve With Korean BBQ
A great Korean BBQ experience is all about the side dishes, known as ‘banchan’. Here are a few of my favourites to complete the meal.
- Steamed Rice: A bowl of fluffy short-grain rice is essential for soaking up all the delicious juices from the beef.
- Lettuce Wraps (Ssam): Serve with crisp lettuce leaves (like butter lettuce or romaine) for wrapping the meat. Add a little rice and some Ssamjang (a Korean dipping sauce) for a perfect bite.
- Kimchi: The spicy, fermented tang of kimchi cuts through the richness of the beef perfectly. It’s a non-negotiable side for me! If you enjoy dishes with a balanced flavour profile like this, you might also like my Sticky Chicken Rice Bowls.
- Drink Pairing: A light, crisp lager complements the sweet and savoury notes of the BBQ, while a chilled glass of Soju is the traditional Korean choice.
Frequently Asked Questions
Korean BBQ
Ingredients
Method
- Prepare the Marinade: In a blender, combine the chopped pear, soy sauce, minced garlic, grated ginger, brown sugar, sesame oil, mirin, and black pepper. Blend until the pear is completely puréed and the mixture is smooth.
- Slice the Beef: If you haven't already, slice your partially frozen beef as thinly as possible against the grain. This is a crucial step for achieving tender Bulgogi.
- Marinate the Beef: Place the sliced beef and sliced onions in a large bowl or a reusable silicone bag. Pour the marinade over the top and use your hands to gently massage it into the meat, ensuring every piece is well-coated.
- Let it Rest: Cover the bowl and refrigerate for at least 1 hour, or ideally overnight for the best flavour and texture. The longer it marinates, the more tender the beef will become.
- Prepare for Cooking: When you're ready to cook, remove the beef from the fridge and let it sit at room temperature for about 20 minutes. This helps it cook more evenly.
- Cook the Beef: Heat a large cast-iron skillet, grill pan, or BBQ over a high heat. You want it to be very hot. Add a tiny splash of neutral oil. What works best for me is cooking the beef in small batches to avoid overcrowding the pan, which would steam the meat instead of searing it.
- Get a Good Sear: Place a single layer of beef in the hot pan. Let it cook for 1-2 minutes per side, until it's beautifully caramelised and cooked through. The thin slices cook very quickly!
- Serve Immediately: As each batch is cooked, transfer it to a serving platter. Garnish the finished dish with chopped spring onions and toasted sesame seeds. Serve hot with your favourite sides.
Notes
I hope you love making this Korean BBQ at home as much as we do. It’s a wonderfully interactive and delicious meal that brings so much life to the dinner table. Give it a try, and please let me know how it turns out for you in the comments below. Happy cooking!
– Sara Gomez